
Introduction to DNA Ligation
In my early days in the lab, setting up a DNA ligation reaction felt like a monumental task. I remember staring at a protocol, multiple tubes in front of me, trying to figure out exact DNA concentrations, molar ratios, and enzyme units. It’s a critical step in countless molecular biology experiments, from cloning genes into plasmids to constructing complex genetic circuits. If you get it wrong, your entire experiment can grind to a halt.
This guide will walk you through the very essence of how DNA ligation works. We’ll demystify the process, break down the components, and provide a clear, step-by-step approach to help you achieve successful DNA assembly. By the end, you’ll not only understand the “how” but also appreciate the power of tools like a DNA ligation calculator in making your lab work more efficient and reliable.
What is DNA Ligation?
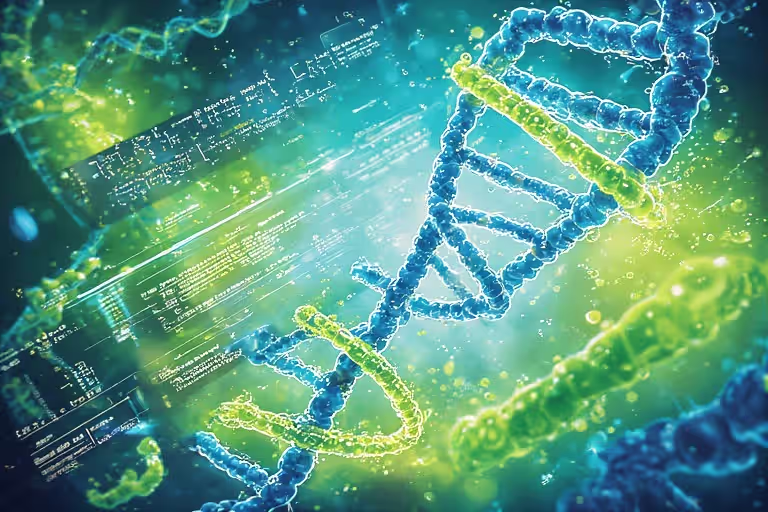
At its core, DNA ligation is the molecular process of joining two separate DNA strands. Think of it as using a specialized molecular glue to stick pieces of DNA together. This “glue” is an enzyme called DNA ligase.
Specifically, DNA ligase forms a phosphodiester bond between the 5′-phosphate end of one DNA fragment and the 3′-hydroxyl end of another. This creates a continuous, intact DNA molecule. It’s a fundamental repair mechanism in living cells, constantly fixing nicks in their own DNA, and in the lab, we harness this natural process for genetic engineering.
Why DNA Ligation Matters in Molecular Biology
DNA ligation is a cornerstone technique in molecular biology because it allows us to create recombinant DNA. This means combining genetic material from different sources. Some key applications include:
- Gene Cloning: Inserting a gene of interest into a plasmid (a small, circular DNA molecule) for replication and expression.
- Constructing Libraries: Creating collections of DNA fragments for screening, such as cDNA libraries.
- Site-Directed Mutagenesis: Introducing specific changes into a DNA sequence.
- Synthetic Biology: Assembling multiple DNA parts to build novel genetic circuits.
- Genome Editing: Repairing DNA breaks induced by tools like CRISPR.
Without efficient DNA ligation, most genetic engineering experiments would be impossible.
Key Components of a Ligation Reaction
A successful DNA ligation reaction relies on a few essential ingredients working in concert. Understanding each component helps you troubleshoot and optimize your experiments.
T4 DNA Ligase: The Molecular Glue
The star of the show is typically T4 DNA ligase. This enzyme, originally isolated from a bacteriophage, is renowned for its ability to join both cohesive (sticky) and blunt-ended DNA fragments. It requires ATP as a co-factor to provide the energy for forming the phosphodiester bond.
- Mechanism: T4 DNA ligase recognizes the 5′ phosphate and 3′ hydroxyl groups at the ends of DNA fragments.
- Energy Source: It hydrolyzes ATP to ADP and inorganic phosphate, using this energy to create the bond.
- Versatility: Works with various DNA end types, making it highly useful in cloning.
Ligation Buffer: The Reaction Environment
The ligation buffer provides the optimal conditions for T4 DNA ligase to function. A typical ligation buffer contains several key ingredients:
- Tris-HCl: Maintains the pH at an optimal level (usually around 7.5-7.8).
- MgCl₂: Magnesium ions are essential cofactors for the ligase enzyme.
- DTT (Dithiothreitol): Keeps the ligase enzyme stable by protecting its disulfide bonds.
- ATP: As mentioned, ATP is a crucial energy source for the ligase. Without it, the reaction won’t proceed efficiently.
Using the correct buffer, usually supplied with the ligase, is vital for enzyme activity.
DNA Fragments: The Pieces You’re Joining
These are the pieces of DNA you want to join. They typically include:
- Vector: Often a plasmid, this is the backbone DNA molecule that will carry your insert. It’s usually linearized (cut open) to allow insertion.
- Insert: This is the gene or DNA sequence you wish to clone into the vector.
The quality and concentration of these DNA fragments are paramount. They need to be pure, free of contaminants (like salts or proteases), and in the correct form (e.g., cut with restriction enzymes to create compatible ends).
Setting Up Your DNA Ligation: A Step-by-Step Guide
Getting your ligation reaction right involves careful preparation and precise execution. Here’s a typical workflow.
Step 1: Prepare Your DNA Fragments
Both your vector and insert DNA must be prepared correctly. This usually involves:
- Restriction Enzyme Digestion: Cutting both the vector and insert with appropriate restriction enzymes to create compatible ends (e.g., sticky ends or blunt ends).
- Purification: Removing restriction enzymes, salts, and small DNA fragments. This often involves gel extraction or PCR purification kits. Clean DNA is crucial for efficient ligation.
- Quantification: Accurately measuring the concentration of your purified vector and insert DNA (e.g., using a Nanodrop or Qubit). This is critical for calculating molar ratios.
Always double-check your DNA quality before moving on.
Step 2: Calculate Molar Ratios (and why a calculator helps!)
One of the most critical steps for successful ligation is using the correct molar ratio of insert to vector. If you have too much vector, it can self-ligate. Too much insert, and you might get multiple inserts or concatemers. A common starting point is a 3:1 molar ratio of insert to vector for sticky-end ligations, and potentially higher for blunt-end ligations (e.g., 5:1 or 10:1).
Calculating this accurately by hand can be tedious and prone to error, especially when dealing with different fragment sizes and concentrations. This is where a DNA ligation calculator becomes incredibly useful. You simply input:
The calculator then quickly tells you exactly how much volume of each DNA fragment you need for your desired ratio and total reaction volume. This saves time and minimizes pipetting errors.
Step 3: Assemble the Ligation Reaction
Once you have your calculated volumes, assemble the reaction in a sterile microcentrifuge tube, typically on ice. A standard reaction volume is often 10-20 µL.
Add components in this order:
- Sterile water (to bring total volume).
- Ligation Buffer (usually a 10x stock).
- Vector DNA.
- Insert DNA.
- T4 DNA ligase.
Pipette gently to mix and spin down briefly. Always include a control reaction: vector-only ligation (without insert) to assess self-ligation efficiency.
Step 4: Incubate for Success
The incubation conditions depend on the type of DNA ends:
- Sticky Ends: Typically incubated at 16 °C for 30 minutes to 4 hours, or sometimes overnight for maximized yield. The cooler temperature allows sticky ends to anneal more stably.
- Blunt Ends: Often require lower temperatures (4-12 °C) and longer incubation times (overnight) or more ligase, as blunt-end ligation is less efficient due to the lack of hydrogen bonding between bases.
Follow your enzyme manufacturer’s recommendations. For maximum flexibility and efficiency, I often choose an overnight 16 °C incubation for sticky ends if time allows.
Step 5: Post-Ligation Steps
After incubation, you might heat inactivate the ligase (e.g., 65 °C for 10 minutes) to prevent further activity during storage. The ligated DNA is then typically used for bacterial transformation. Here, the ligated plasmid is introduced into competent bacterial cells, which then replicate the plasmid.
The subsequent step involves selecting for successful transformants, usually with antibiotic resistance markers present on the plasmid.
Optimizing Ligation Efficiency and Troubleshooting
Even with careful steps, ligation can sometimes fail. Here are some key ligation efficiency tips and troubleshooting advice.
DNA Quality and Quantity
- Purity: Contaminants like salts, restriction enzymes, or phenol can inhibit ligase activity. Ensure your DNA is thoroughly purified.
- Intact Ends: Use fresh restriction enzymes and avoid excessive handling that can damage DNA ends. Phosphatase treatment of the vector is crucial to prevent self-ligation, especially for sticky-end connections.
- Accurate Concentration: As discussed, precise DNA quantification is essential for calculating molar ratios. Re-quantify if you suspect inaccuracies.
Temperature and Incubation Time
- Sticky-End Ligation: 16 °C is often optimal. It balances ligase activity with the stability of hydrogen bonds between sticky ends.
- Blunt-End Ligation: Requires more enzyme and often longer incubation times at lower temperatures (e.g., 4 °C) or even the addition of molecular crowding agents like PEG to increase local DNA concentration.
- Over-ligation: Excessively long incubation times or too much ligase can sometimes lead to concatemerization (multiple plasmids ligating together) or self-ligation of the vector.
Buffer Conditions and Additives
- ATP Concentration: Ensure your buffer has fresh, adequate ATP. ATP degrades over time, especially with freeze-thaw cycles.
- Molecular Crowding Agents: For challenging ligations, especially blunt ends, adding polyethylene glycol (PEG) can increase the effective concentrations of DNA and enzyme, improving efficiency.
- Divalent Cations: Magnesium (Mg²⁺) is essential for ligase activity. Ensure its concentration is correct in the buffer.
Troubleshooting Common Ligation Problems
- No Colonies: Check DNA concentrations, enzyme activity, and buffer freshness. Verify compatibility of DNA ends. Confirm successful transformation with a positive control.
- High Background (too many vector-only colonies): Indicates vector self-ligation. Consider treating your vector with alkaline phosphatase to remove 5′-phosphate ends, preventing it from ligating to itself. Ensure your insert-to-vector ratio is appropriate.
- Wrong Insert Orientation/Multiple Inserts: Can indicate issues with restriction sites or an overly high insert-to-vector ratio.
How the DNA Ligation Calculator Simplifies Your Work
Let’s circle back to the DNA ligation calculator. This tool is not just a convenience; it’s a powerful asset for improving the reliability and reproducibility of your molecular biology experiments. Here’s how it helps:
- Eliminates Calculation Errors: Manual calculations for molar ratios are error-prone, especially under lab pressure. The calculator performs these instantly and accurately.
- Saves Time and Reagents: By providing precise volumes, it prevents the overuse of expensive enzymes and DNA, and speeds up experimental setup.
- Optimizes Efficiency: It guides you to use optimal insert:vector ratios, which are critical for maximizing your desired ligation product and minimizing unwanted byproducts like vector self-ligation.
- Supports Beginners: For those new to molecular biology, it simplifies a potentially confusing part of the protocol, building confidence and reducing frustration.
To use it, you’ll simply input the concentration of your vector and insert DNA, their respective lengths (base pairs), your desired insert:vector molar ratio, and your total reaction volume. The calculator then magically tells you exactly how many microliters of each DNA solution to add. This simple step can dramatically improve your cloning success rates and is a prime example of effective ligation efficiency tips in action.
Conclusion
DNA ligation is a foundational technique in molecular biology, enabling the precise assembly of genetic material. Understanding what it is, the roles of T4 DNA ligase, buffer, and DNA fragments, an efficient step-by-step process, and how to troubleshoot are essential for success.
By mastering the principles outlined here and leveraging modern tools like a DNA ligation calculator, you can significantly enhance your cloning efficiency and reproducibility. Embrace these tools and techniques to make your journey in genetic engineering smoother and more successful.
Frequently Asked Questions
What is the role of T4 DNA ligase in a ligation reaction?
T4 DNA ligase acts as the molecular glue. It forms a phosphodiester bond between the 5′-phosphate end of one DNA fragment and the 3′-hydroxyl end of another, creating a continuous DNA strand.
Why is ATP required for DNA ligation?
ATP is a crucial energy source for T4 DNA ligase. The enzyme hydrolyzes ATP to ADP, releasing the energy needed to form the phosphodiester bond that joins DNA fragments.
What is an optimal insert-to-vector molar ratio for sticky-end ligation?
A common starting point for sticky-end ligation is a 3:1 molar ratio of insert to vector. This ratio helps maximize the chances of a successful insertion while minimizing vector self-ligation.
What’s the difference between sticky-end and blunt-end ligation efficiency?
Sticky-end ligation is generally more efficient because the complementary overhangs (sticky ends) can base-pair, holding the fragments together temporarily for the ligase. Blunt-end ligation lacks this initial base-pairing, making it less efficient and often requiring more ligase, lower temperatures, and/or longer incubation times.
How does a DNA ligation calculator help with experimental design?
A DNA ligation calculator simplifies experimental design by accurately calculating the precise volumes of vector and insert DNA needed to achieve a desired molar ratio for your ligation reaction. This eliminates manual calculation errors, saves time, and optimizes the chances of a successful ligation.
Why do I need to prepare a vector-only control?
The vector-only control helps you assess the background level of self-ligation of your vector. If you get many colonies from this control, it indicates that your vector is ligating to itself, which can mask successful insert ligations.